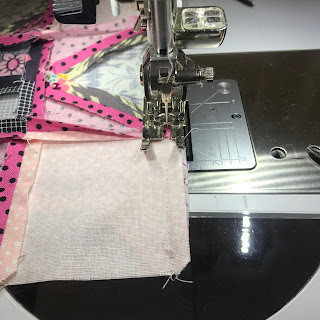
Build the block according to the pattern directions until you get to the eight corner pieces. Remember to leave the eight points open a quarter inch in order to add the corners. Mark the skinny point of each T28 piece to help you start/stop your stitching.
Add one corner piece starting at the square corner edge, pivot in the seam at the diamond piece and sew to the mark at the point of the diamond piece. Leave that open a quarter inch, use the template to mark it.
Place the reverse corner piece on top and pin in place. Flip over.
Sew from the top of the point down into the seam (scissor point below), needle down. Lift the presser foot.
Pivot the fabric and line the top up with the bottom corner unit.
Pivot, line up the bottom with the top square edge. Sew down to finish the seam.
One finished corner!
Proceed with the next corner piece.
Pin in place.
Flip over, sew from corner down into open seam (scissor point), needle down.
Pivot and align top and bottom, sew down to marked point on diamond piece (pencil), needle down.
Pivot at marked point, align top and bottom and sew to finish seam.
Continue adding pieces in the same manner.
For this block I added on all four corners counterclockwise. My block was a little wonky with this method. For the next one I'm going to add opposite corners first, then go back to the other two corners. I'm hoping that will make the block straighter.
I'll be cutting out pieces for the rest of these blocks this weekend. Hope you have fun sewing your blocks too!


This was so helpful to me. Thank you for taking the time to make this tutorial.
ReplyDelete