Sunday, September 24, 2017

Four Patch Star Tutorial - Delilah Block 7

Month seven of the Delilah Quilt is another challenging block.  Just when you think it can't get harder it seems to. The Four Patch Star has more y-seams in its construction.  As long as you are patient, press open, and sew into the seam, you will be able to put this block together.  Keep your seam ripper handy and use it when necessary.  Ripping out a short seam and resewing can really produce a better end result.  Use starch if it helps you.  Refer back to last month's In Orbit Tutorial for help with y-seams.


Build the block according to the pattern directions until you get to the eight corner pieces. Remember to leave the eight points open a quarter inch in order to add the corners.  Mark the skinny point of each T28 piece to help you start/stop your stitching.

Add one corner piece starting at the square corner edge, pivot in the seam at the diamond piece and sew to the mark at the point of the diamond piece.  Leave that open a quarter inch, use the template to mark it.


Place the reverse corner piece on top and pin in place.  Flip over.  


Sew from the top of the point down into the seam (scissor point below), needle down.  Lift the presser foot.  


Pivot the fabric and line the top up with the bottom corner unit.  


Sew down into the open seam and stop (scissor tip), needle down.


Pivot, line up the bottom with the top square edge.  Sew down to finish the seam.


One finished corner!


Proceed with the next corner piece.


Pin in place.


Flip over, sew from corner down into open seam (scissor point), needle down.


Pivot and align top and bottom, sew down to marked point on diamond piece (pencil), needle down.


Pivot at marked point, align top and bottom and sew to finish seam.

Continue adding pieces in the same manner.


For this block I added on all four corners counterclockwise.  My block was a little wonky with this method. For the next one I'm going to add opposite corners first, then go back to the other two corners.  I'm hoping that will make the block straighter.  

I'll be cutting out pieces for the rest of these blocks this weekend.  Hope you have fun sewing your blocks too!


Friday, September 22, 2017

Blogger's Quilt Festival Fall 2017

Amy Ellis is hosting the Fall 2017 Edition of the Blogger's Quilt Festival.  This is a great place to see lots of inspiring quilt works.  There's so much eye candy posted, go check it out here.

I'm entering my navy and white modern quilt to the festival.  This was designed after a quilt made by Emily Dennis, you can see her version here.  I love how graphic this quilt is and the all over quilting really adds a lot as well.  


Thanks for stopping by my blog.  Enjoy the festival!

Machine quilting by AB Quilting Studio.   


Thursday, September 21, 2017

Delilah Quilt - Block 6

Month six of the Delilah Quilt is the In Orbit block, with a center perfect for fussy cutting.  If you are following along I discussed this block in my last post, including a short tutorial for inserting the center star into the block.  Here's the final roundup of all four versions.


My favorite is the top left, but I love all of the combinations.  It really is a lot of fun determining which fabrics to use in each one.  Now, on to the next block!

Linking up with Sew Fresh Quilts for Let's Bee Social and Crazy Mom Quilts.

Sunday, September 3, 2017

In Orbit Tutorial - Delilah Block 6

Back to another installment for Delilah.  Well, we've made it to Block 6, In Orbit.  No curves, good news! Crazy y-seam block construction = another test of patience and precision.  If I can do it, so can you.


The directions that come with the templates are pretty light.  I think they assume a lot of prior knowledge and skill on the part of the person sewing.  It took me a bit to figure this one out and thought people might like some help.  Here's how I managed the y-seam to inset the four point portion of the block.  Just remember to press open and hit your needle into the seam and you'll be set!

Follow the included directions to create the corner quadrants.  Instead of creating the four point and square unit, only create two points and the square.

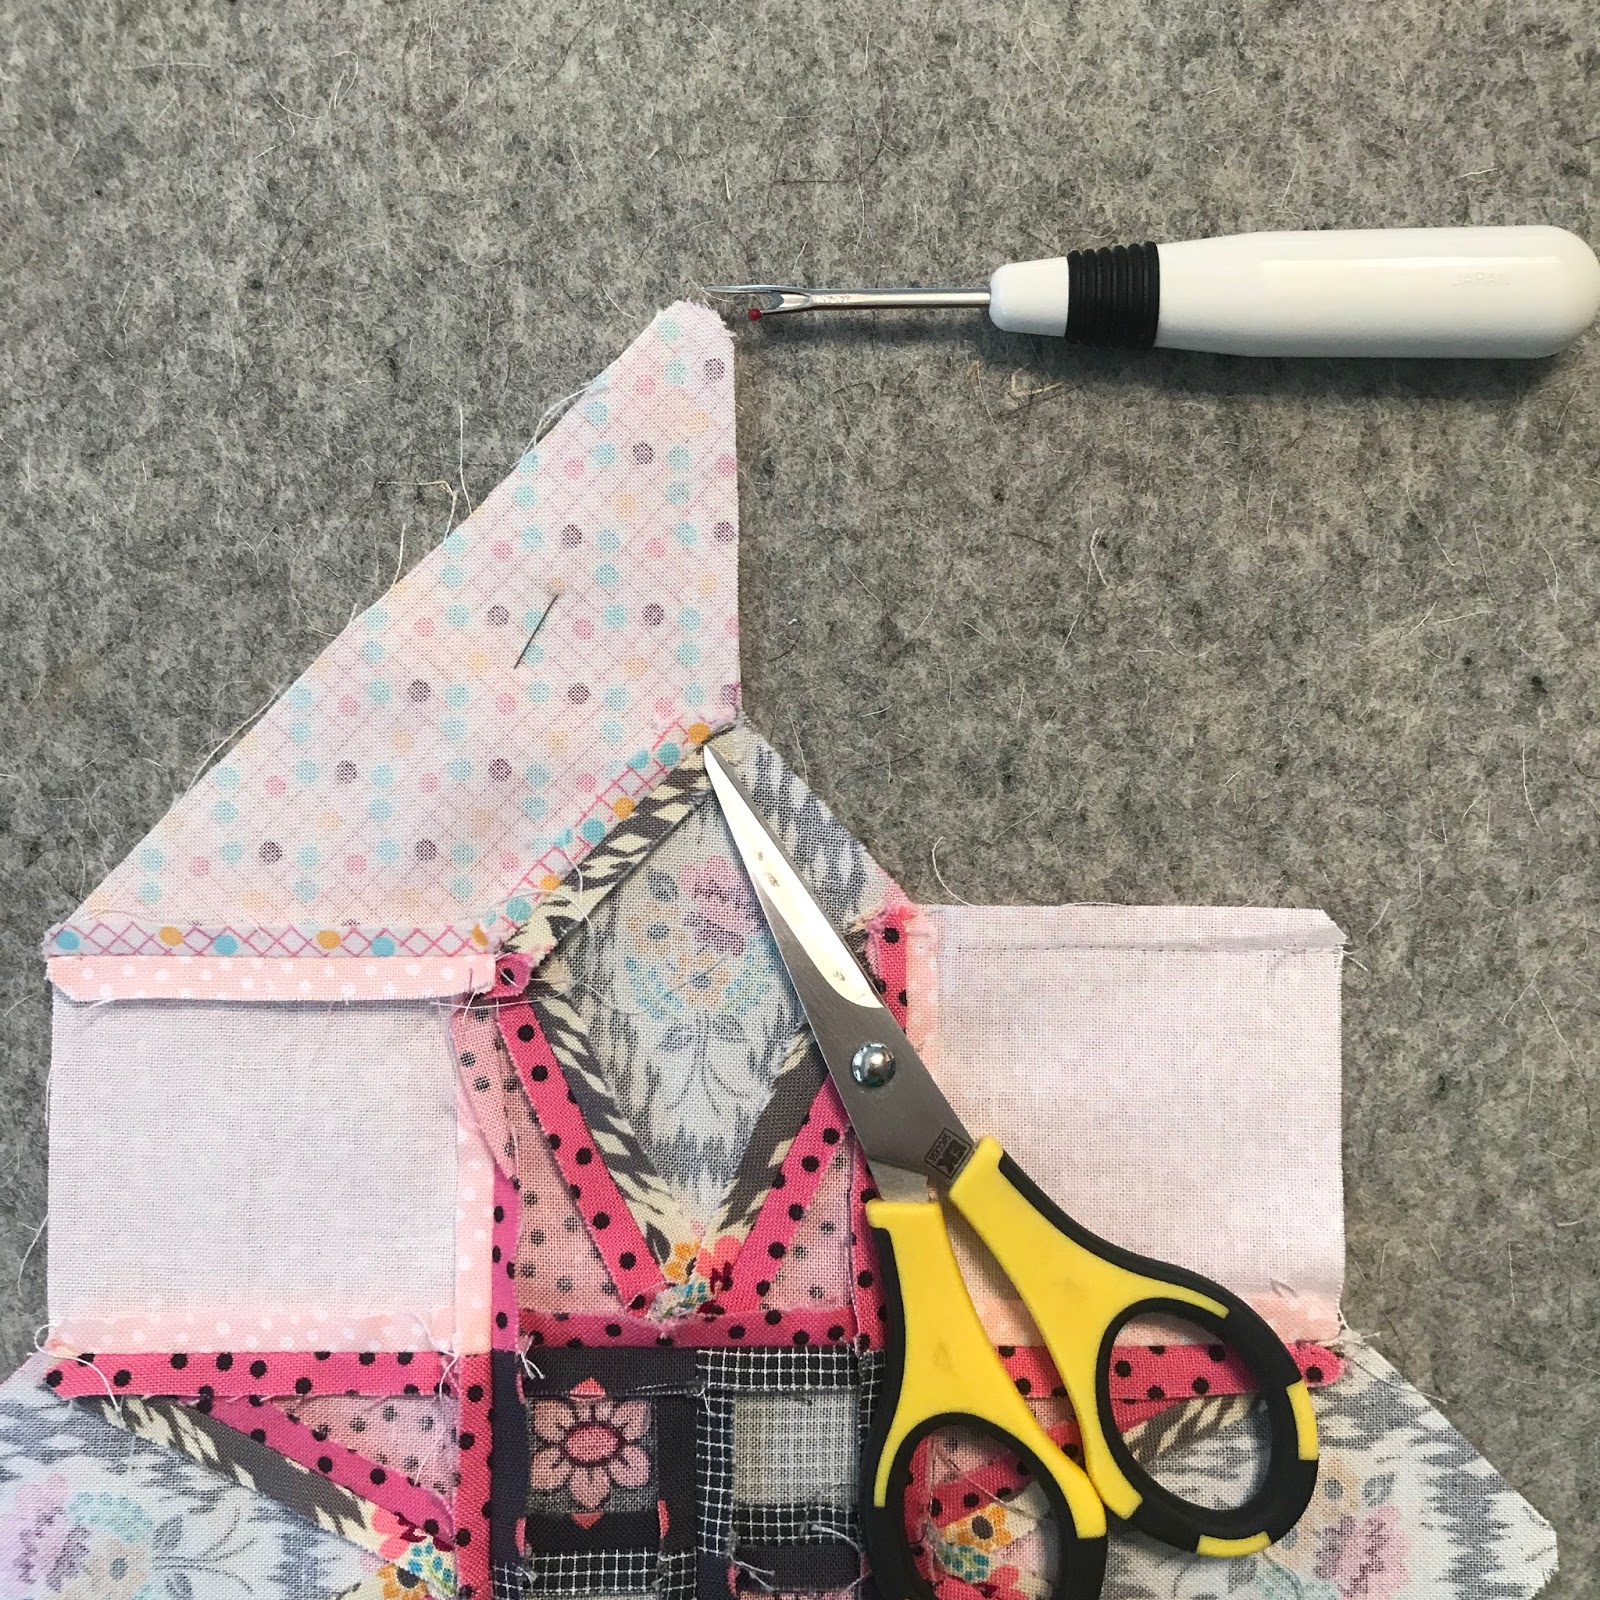
Inset the remaining two points in between two of the corner units each.  This will make two partial halves of the block.  Be sure to leave the top and bottom of the T25 piece open, so mark the top of the point and the bottom at quarter inch and sew from point to point.  Take the corner/point unit and place the other corner unit on top, lining up the T24/T23 portion, sew from the top down into seam at the bottom of the T23 piece. Seams were pressed open so you can see the seam and put the needle right into the seam at 1/4 inch.  Lift up the presser foot with needle down.  Then pivot the top to line up with the angle of T25 and lay flat, put the presser foot down and stitch.  Stop at the bottom marked point on T25.


Place the square/two point unit on top of the left half block unit.  Line up the square and pin in place.


Lower your presser foot and place the needle (use the hand wheel) right in the seam at 1/4 inch.  Sew from seam to seam, again dropping your needle right at the seam.  This should also put the needle in the bottom seam.  I like to take a stitch back and forth at these stop/start points.  Lift the presser foot with needle down in the seam.  Lift the top and pivot it to line up with the bottom of T22.  Sew to the point marked on T25.


Remove unit from the machine and turn it to the other T25 piece.  Pivot the fabric to match it to T22, flip it over and put it in the machine with the needle down into the seam, which will be the point on T25 underneath.     


Sew down into the next seam again, backstitch and stop in the seam.  


Remove and press seams open, now you have one seam left to sew to join the halves together.


Place right side on top of left and match at the top T24/T23 portion.  Sew each section across the seam, stopping in the seam with the needle down as before.  Each time you stop in the seam, lift the presser foot with the needle down and pivot the fabric lining up the pieces and sew down into the next seam.  Continue across the seam.  Press open again.  


The key to y-seams is to press open and put your needle right into the seam at 1/4 inch.  Pivot your fabrics and line them up flat then sew to the next seam.

Who knew what a BIG challenge this Delilah quilt would be.  These inset y-seams are (almost) making me wish for the curves again.  If you're participating, here's to the halfway point and on to the next half.  Take your time, relax and enjoy!

Linking up with Sew Fresh Quilts.