Showing posts with label TOM. Show all posts

Monday, March 26, 2018

Delilah Quilt: Pinwheels and more...

I'm continuing on my Delilah Quilt journey with the last of the block piecing.  So far we've had twelve months of blocks with twelve, nine, and six inch finished sizes.  The final month included directions for piecing 31 pinwheels and cutting 34 squares to finish at three inches.  So off to work I went.  Here's where I started.

Delilah Pinwheel

Then I moved on to these.

Delilah Quilt
And a few more.

Delilah Quilt

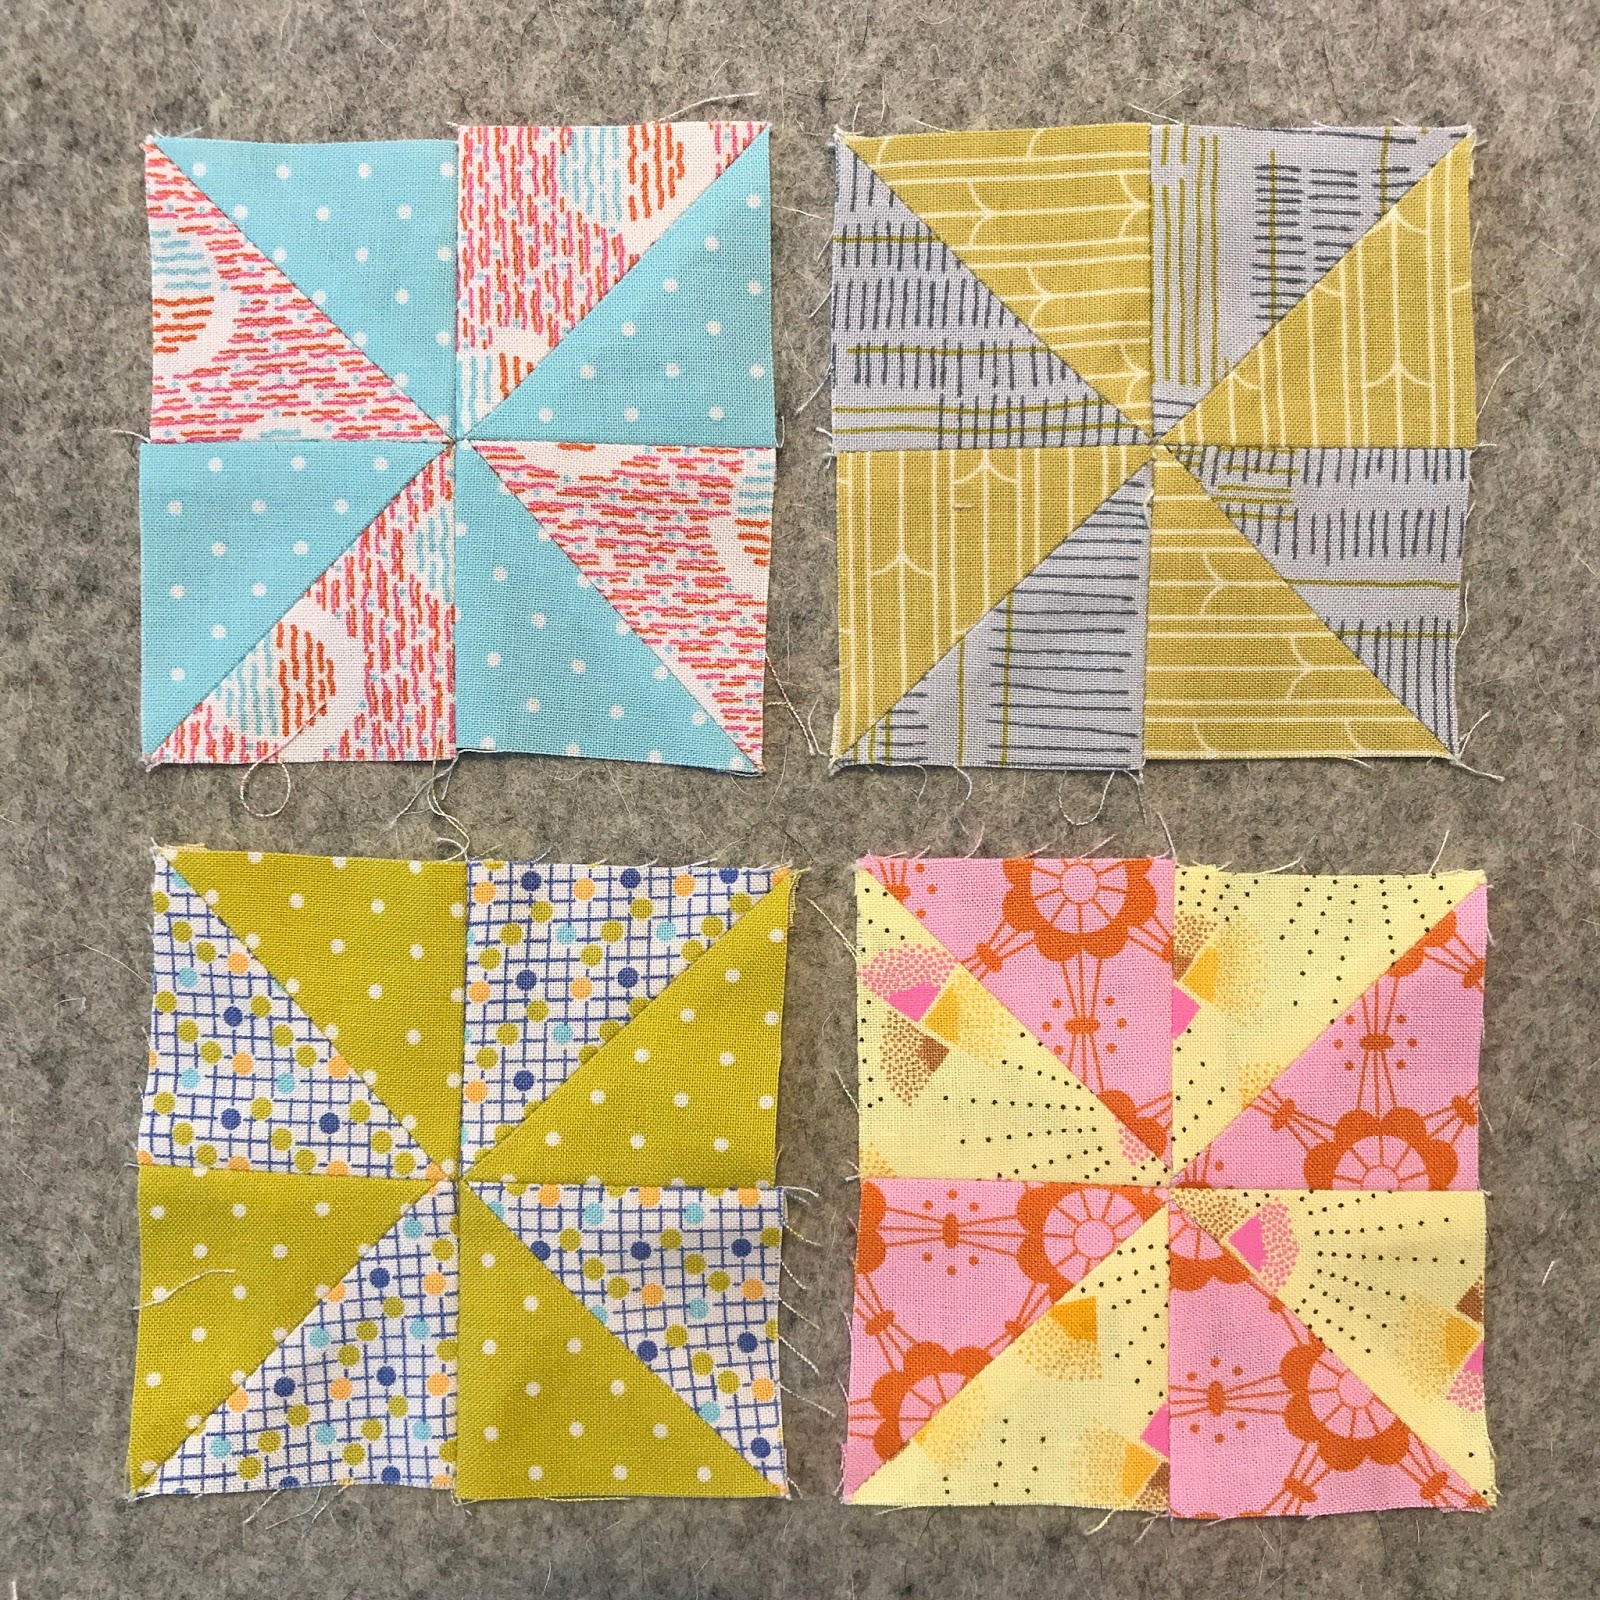
At this point, I realized that 31 pinwheels are a lot of the same thing.  So with the last set, I decided to put them together into a variation and here's what I ended up with.

Delilah Quilt

I'm happy that I decided to add a little variety to the mix.  Here are a few close-ups of my favorites.


Sew Some Sunshine

Sew Some Sunshine Delilah

Sew Some Sunshine Delilah

Sew Some Sunshine Delilah

Next, I'll be working on my layout and adding the squares.  My plan is to use one fabric for the filler squares to keep things a little calmer. After all, there's a lot going on with this quilt!  Although I won't make this quilt as a finish for quarter 1 of the 2018 Finish-A-Long, I am happy with my continued progress.  How are you doing with your sewing goals?  

Linking up with BOMs Away.  

Friday, March 9, 2018

Delilah Quilt - Block 12

This is the final block for the Delilah Quilt and it's called Black Cockatoo.  This block was so easy compared to all of the other months.  The cutting did not require any reverses, the pieces were a good size, no curves, no y-seams, no seams to line up... the hardest part was picking the fabrics!


Kept this kind of simple, but I did use a few different fabric placements.  Some have all the same background, some have two different backgrounds which creates a little bit of a pinwheel effect.  On some I made it look like four different triangles with two on top and two underneath.  For others, I used the same fabric for each template piece.  It's always fun to see how you can make each block look different depending on how you decide on your fabrics and placement.


My next step for this project is to decide what blocks should go where within the placement layout that was provided in the pattern.  I have a few main color groups in my blocks so I'm going to start with a layout that keeps them grouped together and see how that looks.  Even though the original Jen Kingwell design is super scrappy, I'm going to try to dial it down a bit.  Wish me luck!  

You can see all of my blocks along with a few helpful tutorials for machine piecing on my Delilah page.  Also check out more great Delilah inspiration here

Linking up with Busy Hands Quilts and Sew Fresh Quilts.  

Monday, February 26, 2018

Delilah Quilt - Block 11

Month 11 of the Delilah Quilt is the Princess Cut block.  This is a 6-inch block with 32 pieces!  The construction isn't difficult but it is very time-consuming.  For tips on how to construct this block check out my Princess Cut tutorial post.

Here's the final round-up of my nine blocks.


Click here for more great Delilah Quilt inspiration, or visit my Delilah page to see additional blocks.

Linking up with Crazy Mom Quilts and Busy Hands Quilts

Saturday, February 24, 2018

Princess Cut Tutorial - Delilah Block 11

The Princess Cut block (Delilah Block 11) isn't terribly difficult to piece together, but it does take some accuracy and precision to get everything lined up well.  I've put together a series of photos with some tips for getting accurate points and matching seams.  If you're going to take a few hours for each block, might as well get it right!


These tips assume that you are machine piecing and that all seams are pressed open.  Also, you have to sew over your pins to keep everything lined up.  Do this at your own risk.  I use fine pins and go very slowly with a short stitch length.  I chain piece all of the pieces together until I have the eight triangle units formed.  Once you get to this point you need to start pinning. 

The best way to get points matching up on this block is to use your pins in two specific ways.  Using two triangle units, put your pin directly through the tips of your points from the back of one unit into the front of the other unit and then all the way through.  Take your time lining up the points.  Then push the pin head all the way down to the fabric and 'nest' the fabrics together.  Once you have the fabrics in the right spot, the second step is to put a pin on each side of that seam/point.


Remove the pin that is pushed through.  Next line up the two ends and pin.  Lastly, check the alignment of the remaining seam join and put a pin on each side of the seam.  Fold down your fabric a quarter inch to make sure you have the seam perfectly matched. 


When you sew the seam watch for the small triangle which will indicate where the point is on the inside.  Make sure you sew your 1/4 inch just below the point, do not sew over the point.


Repeat four times to join the eight triangle units.  Now you will have four square units.  Use the same pinning techniques to match the squares together as shown below.  Start by matching the corner points with the pushed through pin.  


For the two halves, you will need to push through three pins, one for the center point of the pinwheel, and one at each corner.


Then put two pins on both sides of each pushed through pin to match the points, then remove the three pushed through pins.  Next match the seams for the outside edges of the pinwheel squares by using two pins on each side of the seam.  You will need ten pins in total here. 


Sew the last seam to join both halves.  There you have it, points and seams matched through the use of expert pinning and slow sewing.


Good luck with your Princess Cut blocks, can't wait to see what you make!

Thursday, January 4, 2018

Mayflower Tutorial - Delilah Block 10

I've noticed a little bit of a slowdown with the Delilah crowd lately and I can't say I blame anyone...this program continues to be a challenge.  Last month's Sprinkled Delight was full of small curves.  Mayflower, block 10, seems easier but requires y-seams.  Directions for the month state "This block includes a Y seam, so you may find hand piecing easier for each block."  Well, I'm committed to doing this thing completely by machine, so this was another time to figure out a construction method for the block on my own.  I've come up with some steps that might help if you're also machine piecing.  Even though this is December's block, I think people are still catching up, so I hope this helps a bit!


Cut out all the template pieces to make your block.  Place T40 on top of T39 as below.  Mark the bottom point on T40.  Starting at the top, sew down to the marked point and backstitch two stitches.  Press seam open.  Repeat with one other T40 and T39 piece.  If you are using two fabrics for T39, repeat with same fabric.  


Next, line up your second T39 piece on top of the first unit as shown below.  Turn over, sew from bottom point into seam with your needle down (will be at 1/4 mark).  Lift presser foot, and pivot the top fabric to line up with the bottom.  Lower the presser foot and stitch to the end.  Press seam open.  Repeat to make two units.  


Take one of your units and two T40 pieces.  Mark both T40 pieces at the bottom point.  Sew one T40 to the right side of the unit starting at the top and stopping and backstitching at the point.  Press seam open.  Add the second T40 piece to the same unit on the left side, starting with needle down at the point mark and sewing to the end.  Press seams open.  


Now you should have two units as shown below.  


Lay the smaller unit on top of the larger one with the T39 piece on top of the bottom T40 piece, matching up the sides as shown.


Holding the units together at the bottom, flip it over so that the bottom is now at the top and so that the larger piece now has the open seams facing you.  Start sewing from the top and stop and pivot (needle down) at the 1/4 inch point.  Sew across the center and match up the center seam as you go, stopping with your needle down right in the next 1/4 inch seam join.  Pivot again, match up the fabrics and sew to the end.  Keep a true 1/4 inch seam as you sew and line up each side carefully as you pivot.  Sew across to join both units.  Press open.


Add your four corner triangles and that's it!  


I'd love to hear how your Delilah blocks are coming along.  Are you hand piecing or machine piecing?  Can't wait to see your Mayflower blocks - Happy New Year and happy sewing!

Linking up with Busy Hands Quilts.